May 21, 2012

Mini Unimog THW


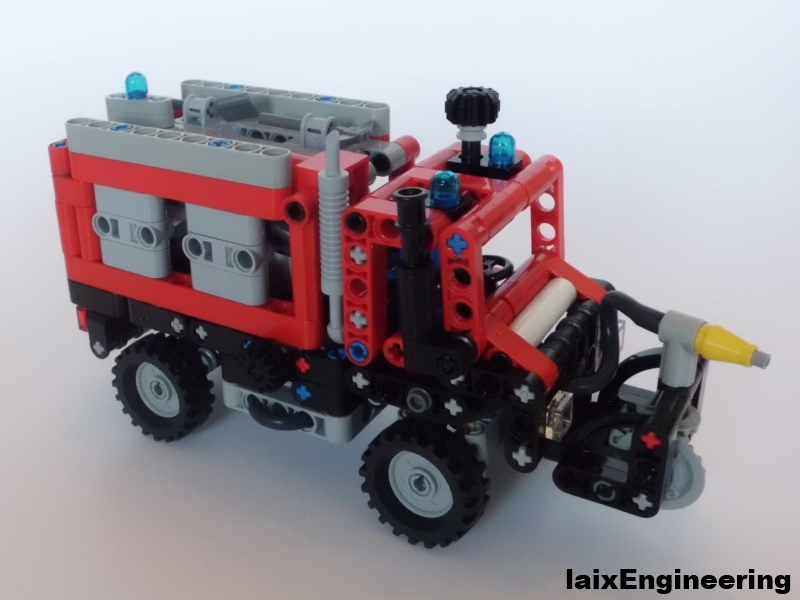
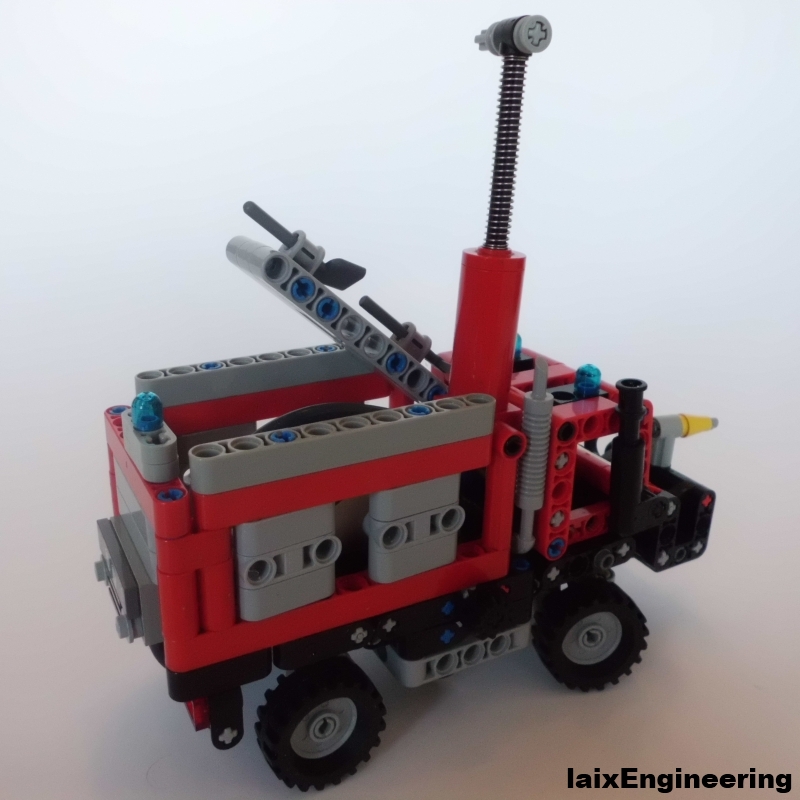
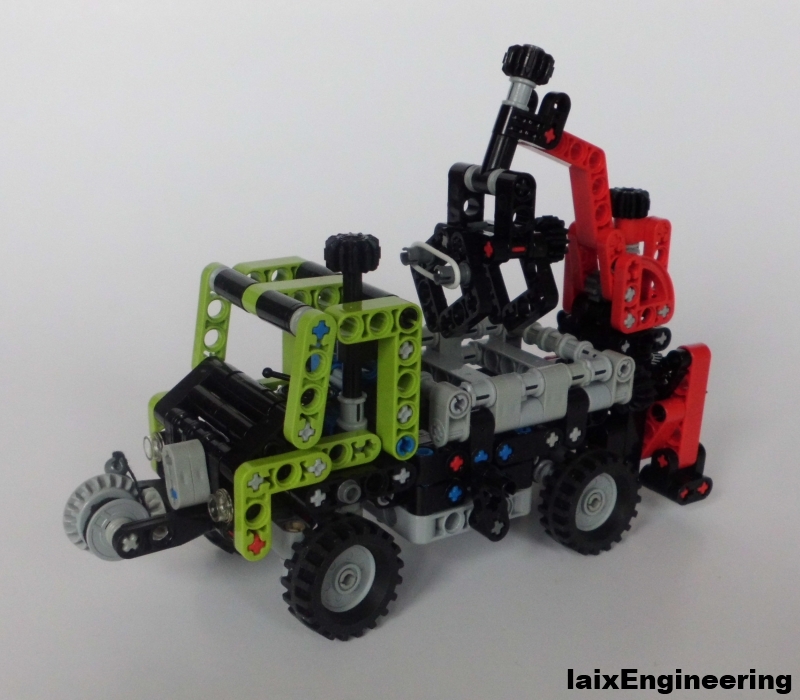
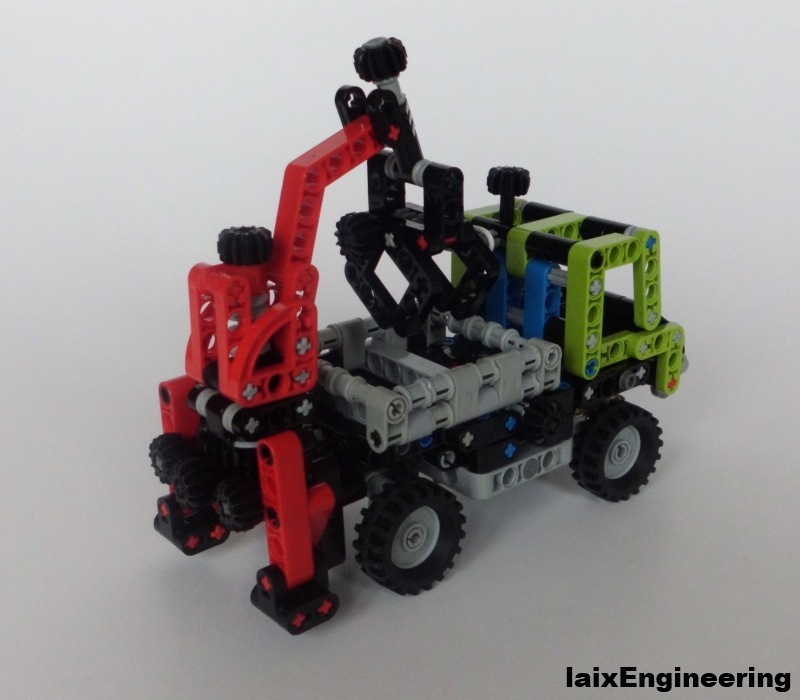
While being busy at work and university I spent less time building with LEGO®. I tried to work on some projects like a dumper truck and a street sweeper, but both of them need some more time because of problems in development and lack of time figuring those. So I came up with a THW-Version of my Mini Unimog Fire Brigade.

"THW (Technisches Hilfswerk) is the Federal Agency
for Technical Relief of the Federal Republic of Germany.
Its statutory tasks include the provision of
technical assistance at home and humanitarian aid
abroad."
Source: http://www.thw-nw.de

Its main features are as follows:
- 9V power supply with "generator" and light towers
- Trailer with lifting mechanism
- Boat with raiseable propeller and hatch

And this is what I came out with.


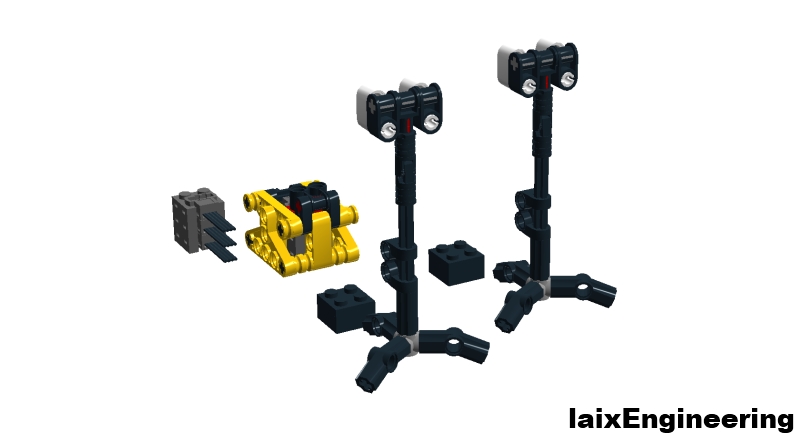
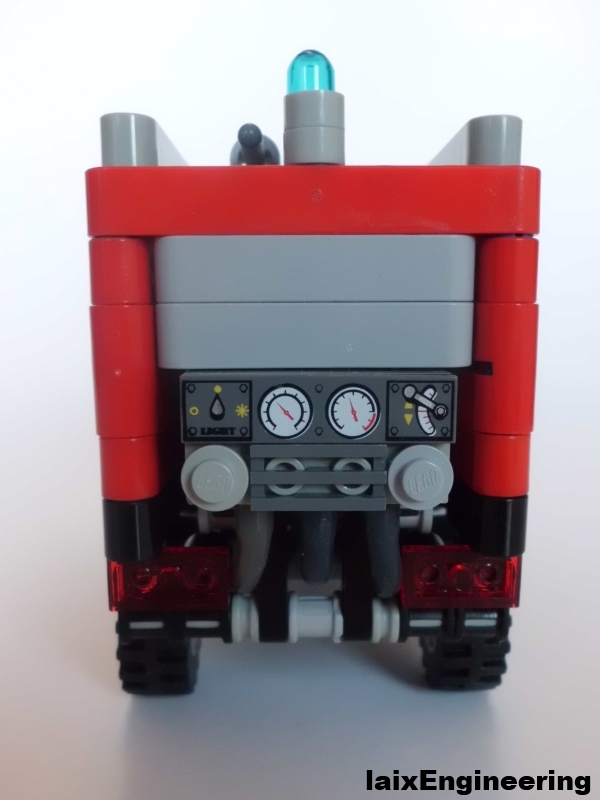
I used a Hinge with Towball Socket (30396) and a Steering Knuckle Arm (6572) to attach the trailer to the Unimog. Therefore, the Hinge is placed inbetween two Axle and Pin Connectors Perpendicular (6536). At the back is the 9V power take off using a Plate 2 x 4 with Contacts (4757) connected to an Electric 9V Battery Box Small (4760c01) via an old Electric Wire (5306b).


The trailer can be lifted to launch the boat, while the winch can pull it out of the water. Both functions use a combination of a Gear 8 Tooth (3647) and an Axle Pin with Friction Ridges (42093).


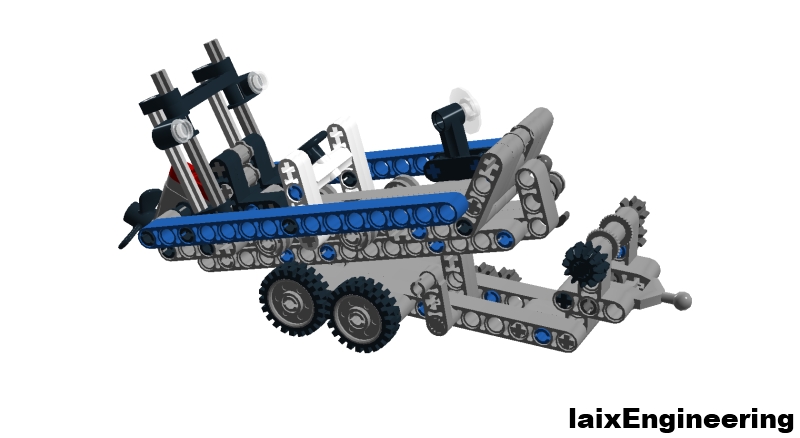
The boat is also a simple build with hatch at the front to rescue people drowning, a searchlight and a raisable propeller.


One of the various helpful tasks of the THW is to illuminate the deployment location. So it has two light towers using the PF LEDs (61930c01) and a generator to "hide" the wire connectors of the PF LEDs and the PF Extension Wire (60656).


This is my first presentation without real photos due to the lack of some parts (and money) and I would like to get some feedback, if this is an equivalent alternative to photos of the build model.

More detailed pictures to be found on Brickshelf.
You can also download the LDD-File directly.
Note:
LEGO® Digital Designer lacks in some parts, you have to replace the fake parts of these:
- Electric 9V Battery Box Small (4760c01)
- Electric Wire (5306b)
- Electric Plate 2 x 4 with Contacts (4757)
- PF LEDs (61930c01)
- PF Extension Wire (60656)

With best regards,
Jan

April 08, 2012

Mini Unimog Fire Brigade

After introducing my Mini Version of the LEGO® Technic 8110, I have to build another Version. A Fire Brigade Truck, inspired by VFracingteam's Unimog.

Its main features are as follows:
- 7-wide, compared to the 9390 axle width
- Live axles with suspension
- Portal axles
- HOG (Hand of God) steering

Fire Brigade Version:
- Front PTO with water cannon
- Water tank and pump

And this is what I came out with.


The Unimog is used in rough terrains and with the snorkel it's able to cross small rivers.


A water cannon lets the firemen extinguish the fire from inside the cab.


The roof contains some tools and the "water pump" which is an old Pneumatic Spring Cylinder (5103). Its main advantage over the new pumps (2797c02) is the ability to suck in the water. 


A Pneumatic Airtank (67c01) is used to store the water.


The pump can be lifted to be operated easily and is stored when not in use.


The most important part of the pumping mechanism is the Pneumatic Distribution Block 2 x 4 with Non-return Valve (4692). There is the tank insert on the left, pump in the middle and the water outlet on the right. 


It's a Fire Truck, so it has to be able to extinguish fire. To proof its ability I made a short video.


More detailed pictures to be found on Brickshelf.
Check if you have all the needed parts to build it yourself using Rebrickable.com
You can also download the LDD-File directly.
Note:
I used colored round Plates to show you where to connect the Hoses.
LEGO® Digital Designer lacks in some parts, you have to replace the fake parts of these:
- Pneumatic Spring Cylinder (5103)
- Pneumatic Airtank (67c01)
- Pneumatic Distribution Block 2 x 4 with Non-return Valve (4692)


With best regards,
Jan


March 31, 2012

Mini Unimog U400

This is my latest MOC, the probably smallest functional version of the 8110, unlike the cute 9390, which is very limited in functions. The whole MOC based on an older chassis I now finished the last evenings, using LDD again.

Its main features are as follows:
- 7-wide, compared to the 9390 axle width
- 355 Parts
- Live axles with suspension
- Portal axles
- Front and rear PTO with gearbox
- Working winch
- Working crane with a grabber
- Two outriggers
- Tiltable bed
- HOG (Hand of God) steering

And this is what I came out with.


Unfortunately I didn't own that much orange pieces, so I made it Lime Green for the first presentation.


To achieve a live axle setting I used the Liftarm 1 x 2 with Ball Joint Angled (50923) and realized the suspension with Rubber Connectors (45590).


The winch at the Front-PTO, using the Pin Connector (87408).


The crane is located on the Rear-PTO and uses the new turntable elements (99010, 99009).


 For switching between Front and Rear-PTO a gearbox slides the axles and gears and connect them with the 12T Gear (32270). The axles get connected by pushing them inwards and can easily be disconnected via the crank (33299) on the other side. 


This Mechanism is also shown in the video, also including the other functions in action.
 

More detailed pictures to be found on Brickshelf.
Check if you have all the needed parts to build it yourself using Rebrickable.com
You can also download the LDD-File directly.

There will probably some Building Instructions in the future.


With best regards,
Jan


March 08, 2012

Mini Forklift

After my first attempts at digital (re-) building, I tried to design a model completely in LDD to compare the advantages and disadvantages of digital and manual building (short Conclusion and model at the end of the post).
While studying all day I have nearly no time for building and of course even less motivation to sort my LEGO® afterwards. So I spent my spare time on LDD, creating this small MOC - a Mini Forklift and rebuild it afterwards.

A downgraded version like the disappointing 8290 was definitely no option. The aim was to build a forklift with the following features:
- 5-wide, compared to the 8290
- Manually operated carriage with forks
- Tilting mechanism to pivot the mast to assist in engaging a load
- Rear-wheel steering with HOG (Hand of God)

And this is what I came out with.


The bodywork is dominated by the two yellow Technic Panels (87086, 87080). Like most of the classic LEGO® Technic construction vehicles it has the famous blue seat. The cab features some headlights, a strong roof to protect the driver and some levers to control the functions.


The steering is simple and direct via a HOG. The rear wheel (42610, 50945) is centered 1/2 L below the front wheels (56902,61254) to be on ground level. I used some Liftarms 1x2 Thin (41677) to delimit the steering angle.


The tilting mechanism uses a Gear Worm Screw (4716) and a Gear 8 Tooth (3647) which are connected to the mast via a Connector Perpendicular Triple (63869).


After several failed attempts at creating a movable carriage with chain-elements and ropes, I adapted shockbeton's design because of its reliability and simplicity on this small scale. To use more common pieces and increase the range, I replaced the Gear Rack 1x10 (6592) with three Gear Racks 1x4 (3743) placed on Plates 1x2 (3023) and 1x8 (3460).


And this is how the forklift looks in action, lifting a pallet with my Small Fake Engine.


Conclusion:
I loved the intuitive working with the quick auto-connection and experienced no difficulties while building in LDD. To have an overlook of all the different connectors was quite useful, too.
Building the real model with auto-generated instructions was a difficult task because there are nearly no logical separations between the steps. I also had to redesign some areas because of the lack of parts in correct colours. Despite this fact I will definitely try this workflow more often on smaller MOCs.


More detailed pictures and building instructions to be found on Brickshelf.
Check if you have all the needed parts to build it yourself using Rebrickable.com
You can also download the LDD-File directly.


With best regards,
Jan


February 21, 2012

Small Fake Engine

After some long days at the university, I spent an evening building some random stuff. Related to my other smaller MOCs I developed a tiny two cylinders fake engine, which could be used in 7-wide-vehicles.

According to the small scale the Technic Engine Cylinder (2850) and it's half stud Crankshafts (2853, 2854) were no option. In the end I came up with this concept using a Bar 4L Lightsaber Blade (30374) and two Tiles, Modified 1 x 1 with Clip (2555).


As usual I made a short video to show you the sweet engine sound.


Additionally I provide you something new. My first try in a LEGO® -style building instruction. I will try to develop my own style in the future and hopefully have some time to create some other instructions, too.


Note:
I recommend to use the old Technic, Axle 2 (3704) instead of the Technic, Axle 2 Notched (32062) to guarantee a smooth run. 

With best regards,
Jan


January 23, 2012

Mini Mobile Crane

After finishing my MOD of the LEGO® Technic 9397, I wanted to add pneumatics to other sets. My choice was the Mini Mobile Crane 8067.  I especially like the cabin so I wanted to reuse it completely. The mechanism of the outriggers is also well-done so, I reused them too.

To  make it more interesting I decided to use its parts and make an MOC loosely based on the Liebherr LTM 1200 5.1.

And this is what I came out with. 


All functions are comparable to bigger scale models like e.g., the 8460.

- 5 axle steering system actuated by a 20t, 12t gear reduction on the back
- Four outriggers stabilize the crane while lifting
- A rotating crane, mounted on the new turntable elements (99010, 99009)
- The crane is lifted pneumatically with a Pneumatic Cylinder (47224c01)
- The crane consists of two booms so it can extend
- A hook with rope
- Dummy engine

The most difficult part was the steering system and it took several attempts to realize it. I got inspired by the LEGO® Technic 9390 and developed the idea. This result in a modular system of small size. The turning radius is nearly 40 cm.   


Note: None of the axles are meeting in a pivot point which causes some problems (slipping wheels, vibrations), especially on the front axle. I made this compromise according to the small scale.
More detailed pictures of the steering mechanism to be found on Brickshelf.

The Boom is lifted by a Pneumatic Cylinder (47224c01). Two Small Pumps (x191c01) provide the air and I used a Technic, Shock Absorber 6.5L, Complete Assembly (Normal Spring) (731c05) to run the pumps manually. With an 1L stroke you have to push about 20 times to lift the heavy boom.


The boom is extendable and uses Erik Leppen's design. It's really strong and fits the scale quite well.


I'm very happy how everything turned out and I hope you like it as well.

More detailed pictures to be found on Brickshelf.
Check if you have all the needed parts to build it yourself using Rebrickable.com
You can also download the LDD File directly.
Note:
LEGO® Digital Designer lacks in some parts, you have to replace the fake parts of these:
- Pneumatic Cylinder (47224c01)
- Two Small Pumps (x191c01)
- Pneumatic Switch (4694b)

With best regards,
Jan

January 18, 2012

Motorized Pneumatic Pump

One of my plans for 2012 is to build a pneumatic walker. Therefore, I have to guarantee a sufficient airflow. Main restrictions are space and of course weight. So, my first decision was to use only the Power Functions M-Motor (58120c01) instead of the far more powerful, but two times heavier XL-Motor (58121c01).

After several attempts with different arrangements and a destroyed Pneumatic Pump (5107-1) (yes, I removed the spring and afterwards it couldn't hold the pressure anymore), I started to copy some designs from other builders like e.g., Sariel's compressor and rocking compressor. But I was pleased with none of them.

I wanted something more stable and reliable and when I discovered radbot's concept, I was enthusiastic to build a frame housing those 8 Small Pumps (x191c01). To build it, I used 5 "Liftarm 5 x 7 Open Center Thick" (64179). Because of their numerous Technic holes, you can easily implement the pump in any other creation. The small dimensions of 7x10x10 studs improve the implementation as well.

Because of the 5.5L of the Small Pumps, I used the Pin Connector Perpendicular Long (32557) in order to achieve a 2L displacement on the crankshaft.


Pin Connector Perpendicular Long (32557) in order to achieve a 2L displacement on the crankshaft
 The two crankshafts are counter-rotating

To show you the pump in action, I made some videos. Especially the fancy crankshaft movement made me happy.


More detailed pictures to be found on Brickshelf.

With best regards,
Jan